Create a SendGrid API Key
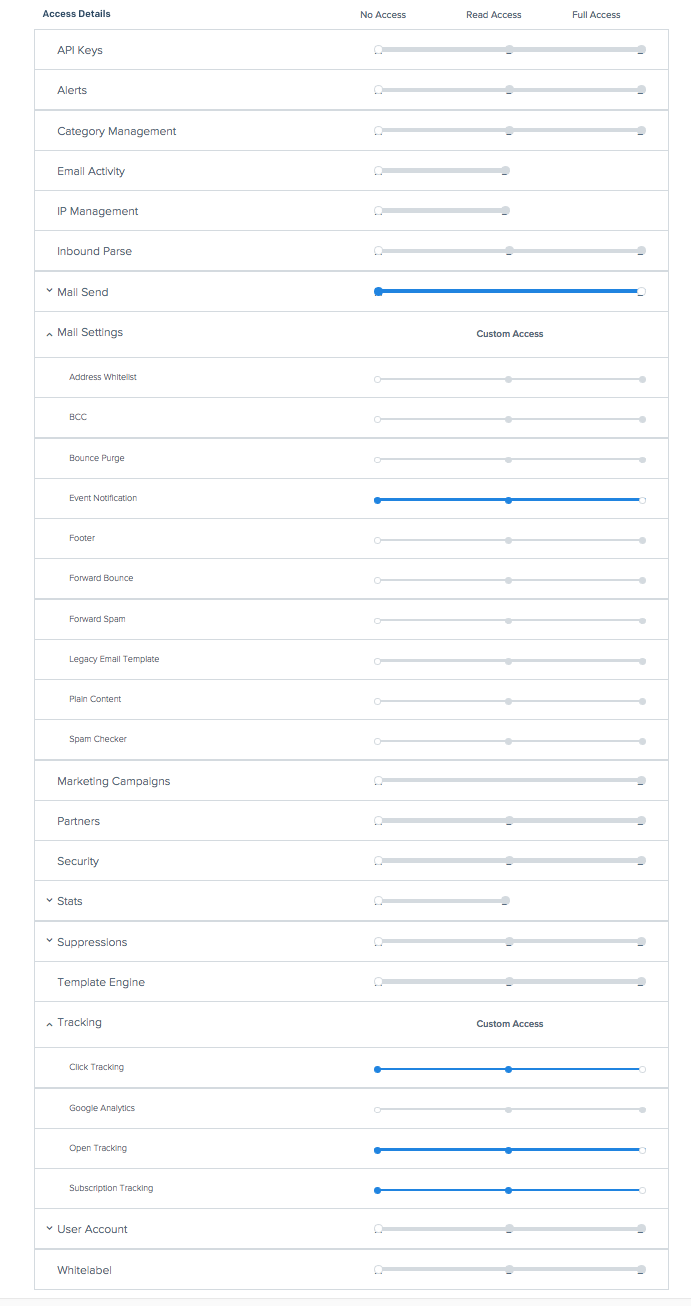
On the SendGrid dashboard, navigate to the API Keys page in the Settings section. From here, you will need to create an API key with either Full Access permissions or Restricted Access with the minimum following permissions:
- Mail Send - Full Access
- Mail Settings
- Event Notification - Full Access
- Tracking
- Click Tracking - Full Access
- Open Tracking - Full Access
- Subscription Tracking - Full Access
Save this API key for the next steps below.
Connect with Sendwithus
- Go to your Delivery Settings in the Sendwithus dashboard, and click the Add ESP Account button.
- Name the account and select SendGrid as the Account Type.
- Enter your API Key from your SendGrid account.
- Click the Save ESP Account and wait for verification.
Enable Click, Open, and Subscription Tracking in SendGrid
Enabling these features will allow you to monitor your clicks, opens, and subscription tracking in SendGrid. To verify these options are enabled, follow the steps below.
Step 1. Go to your SendGrid Dashboard and click Settings on the navigation bar, and then select Tracking.
![]()
Note — If all settings are in an Active state, you can stop here.
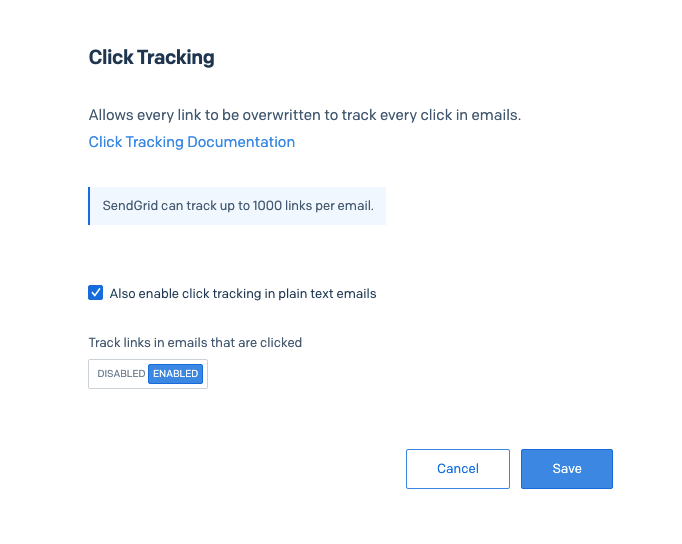
Step 2. Enable Click Tracking.
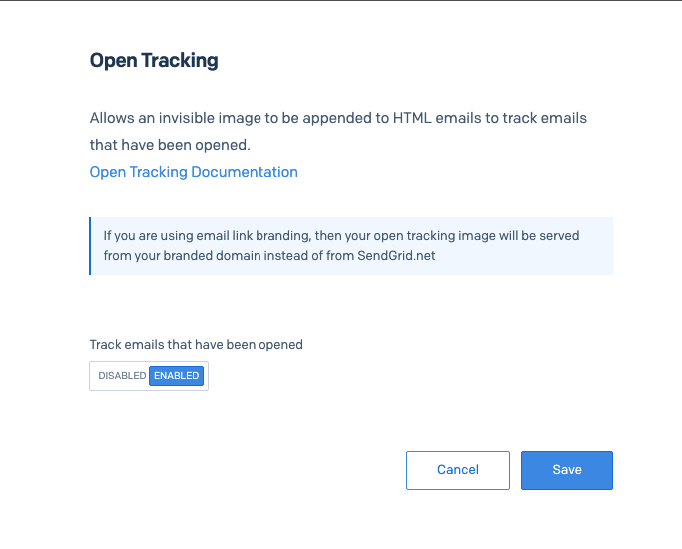
Step 3. Enable Open Tracking.
Step 4. Enable Subscription Tracking App. This will append a default Unsubscribe link at the bottom of your emails. Learn more about managing SendGrid unsubscribes here.
SendGrid Verified Domains and Senders
SendGrid requires users to verify their Sender identities. This represents the “From” email address your recipients will see as the sender of your emails. Sender Identities can be verified by using either of two methods: Domain Authentication or Sender Verifcations. More in-depth information can be found on SendGrid’s documentation site.
Domain Authentication
Domain Authentication is SendGrid’s preferred method of verification. In order to set this up, you’ll need access to your domain’s DNS records. Once the domain has been authenticated, you will be able to send from any email address on that domain. To authenticate your domain, please review How to set up domain authentication from SendGrid’s documentation site.
Single Sender Verification
If you don’t have access to the DNS settings for your Domain, Single Sender Verification allows you to quickly verify one address so that you can get started testing your emails. While it’s a great starting point, SendGrid recommends only using this method for testing or proof of concept. For more information on Single Sender Verification, including a setup guide, review this article from SendGrid’s documentation.
SendGrid Subusers
SendGrid allows for multiple child accounts that you can use to serve different purposes. You add them as new ESP’s just like you did in the ‘Connect with Sendwithus’ step. Learn more about how to use SendGrid subusers here.
SendGrid Unsubscribe Groups
Sendwithus does not support SendGrid’s subscription groups. We recommend using multiple SendGrid subusers as each subuser will include their own global suppression list. This method will also benefit your deliverability as you could separate your marketing and transactional emails to be delivered from different subusers.